
While AutoFill is a popular and simple Excel function, there are many things to check if it stops working. You might be dealing with improper Excel settings or doing something wrong without recognizing it. The solutions listed below should help you resolve AutoFill quickly.
How To Fix Quickly AutoFill Not Working In Excel?
Enable Fill Handle
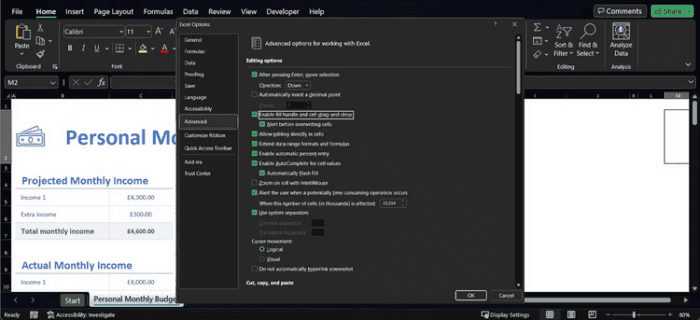
Excel’s AutoFill function may sometimes stop working without notice. When this occurs, you should first check to see whether the AutoFill option is active.
- Navigate to the File menu and pick Options.
- Scroll to the Editing Options section and select Advanced from the left menu.
- Enable the Fill handle and cell drag-and-drop option. You should also check the Alert box before overwriting cells to prevent accidentally changing crucial information.
Provide Excel With More Data
If you offer enough data for the program to recognize an algorithm, AutoFill may work better. Try selecting additional cells or manually entering more data before moving the AutoFill handle.
Remove Unnecessary Filters
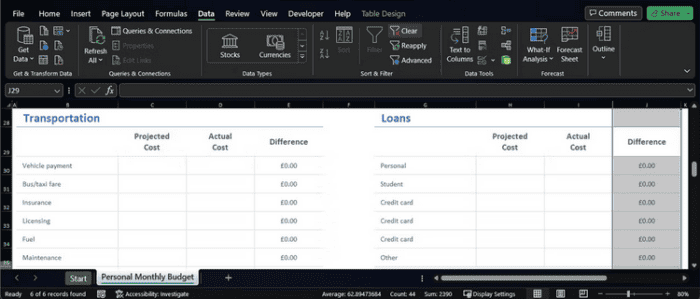
If there is a conflict with another Excel product, the AutoFill function may stop working. For example, if you’ve set a filter to sort Excel data, AutoFill won’t determine which algorithm to employ. The Filter icon is normally in the topmost cell of columns or rows that have applied filters. Follow the steps below to remove the filter.
- Pick the row or column that contains the filter.
- Navigate to the Data tab.
- Click Clear to open the Filter menu.
Stop Pressing Ctrl Or Command
If you press and hold Ctrl or Command while using the AutoFill function, it works differently. If you attempt to fill the cells while pressing and holding the key, AutoFill will repeat the data rather than expanding the sequence of numbers, text, or dates. The key gets stuck if you’re not actively pushing Ctrl or Command. There are a few choices available in this situation.
- Clean your keyboard to remove any dirt that might interfere with the operation of the key.
- If you’re using a USB or Bluetooth keyboard, unplug it.
- Remap the keys so the Ctrl or Command key no longer serves any purpose.
Enable Automatic Calculation
The calculation option is another parameter that may prevent the AutoFill function from working. Open the Calculation Options menu in Excel by clicking the Formulas tab. Select Automatic in that section.

Use AutoFill Command
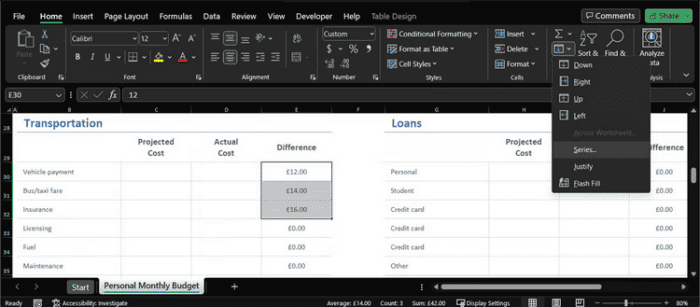
Try another way if you can’t click and drag to autofill your cells. Open the Home tab and select the cells containing the desired data. Select Fill > Series in the Editing menu.
Repair Microsoft 365
If AutoFill is still not working and you haven’t found anything wrong with your Excel settings, there’s a chance that Microsoft 365 has some corrupted or missing data. You should fix Microsoft 365 in this instance. On a Windows machine, follow these steps.
- To access the Settings menu, use the Windows key + I.
- Select Installed Apps from the menu.
- Select Microsoft 365 by clicking the three-dot symbol.
- Choose Modify.
- Select Quick Repair from the popup menu.
- Next, click.
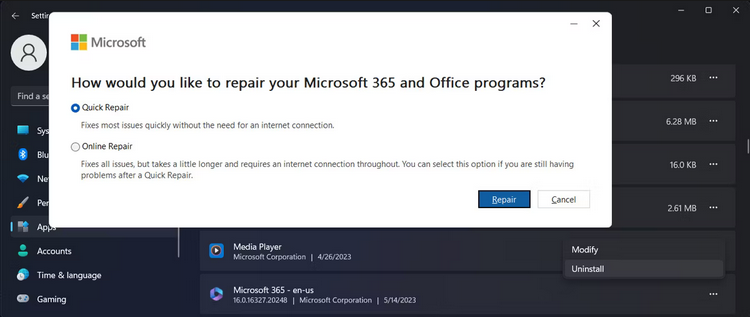
Repeat the previous steps, but this time select Online Repair if this doesn’t get AutoFill working again. Windows will begin a more thorough diagnostic procedure.
Also, Take A Look At:
Conclusion:
Excel AutoFill should be working again, so you won’t have to copy and paste the formula for each cell. If you’re using a pirated version of Microsoft 365, no matter what you attempt, you won’t be able to solve AutoFill. However, you may obtain Microsoft 365 for free and use it to its full potential.