Mastering the editing skills with the professional level of video or image editors is difficult. Such video/image editors include Adobe Photoshop, Adobe Illustrator, Premier Pro, etc. The main reason behind this is the time consumption and effort demand. With the rapid evolution of technology, AI stepped into image and video editing.
Now, the machine learning algorithm of the video and image editing tools has made the editing super simple. One practical example of such a device is the CapCut creative suite. It is not a single tool but contains multiple tools within, including online photo editor and video editors. You can perform various editing tasks, including image/video trimming, resizing, background changing, auto-captions, etc.
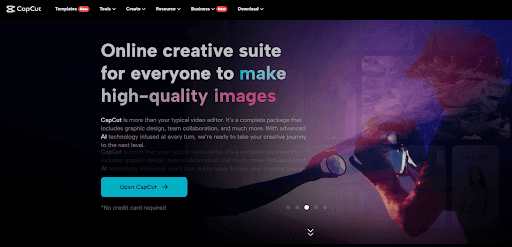
The CapCut creative suite refers to an online tool or service. No matter where you are present around the globe, there is no restriction on who can access this tool. Access this tool and use it the way you want. Let’s unveil the feature and usage process of this creative suite in this short blog post.
Why Prioritize The CapCut Creative Suite Selection?
There is nothing but a list of features and associated perks to make you prioritize the selection of the CapCut creative suite. A few of the notable ones are:
Clip Video Online
The CapCut creative suite includes the full features pack online video editor. You can create mind-bending videos using this creative suite. What you can edit with the videos is to have the background music/sound, add up filters, trim or crop your videos. An option exists to change the playback speed. With a plethora of transitions, you can make the edits unnoticeable. You can add video and audio media to your videos. There are stickers, effects, and texts that you can add to your video to make them attention-grabbing. Apart from this, you can use the text to speech free option to generate speech through a video editor. Each of the elements or editable is copyright and royalty-free. You can choose it anywhere you want, either on the internet or personally.
Generate New Image
You cannot question the quality and tools that the CapCut Suite online image editor offers. An option exists to integrate the shapes and stickers within the images. You can even make a collage of photos using the CapCut online image editor. The image editor also offers you some built-in Apps. These Apps allow you to generate images from texts or AI integration. You can also insert images into pictures by utilizing the existing frames.
Auto Captions Generation
With the CapCut online video editor, you can generate the subtitles to any video you want. In this regard, the auto-captions generator will assist you. This way, you can enhance the understandability and reach of your videos. You don’t need to manually type or use the text as the captions in your videos. This function minimizes the extra effort input from your side. You can also convert video to text by using the transcription option in the online video editor.
Unlimited Tracks
When using the CapCut creative suite, there is no limit on the number of tracks you can use within a video. The addition of multiple tracks within a video allows you to add a captivating feel to the video. No matter what track or audio you choose, everything on the collection of tools is free and copyright-free. You can little bit tweak them and sell them online to earn passive income.
Multiple Size Canvas
You can select from the multiple pre-existed sizes of canvas. There is everything for you to choose from. Whether you want to create an FB cover, Instagram profile picture, Twitter post, FB banner, LinkedIn cover, etc. You can also create a custom size of the image to keep working. There is no limit on the size. You can make the size either in pixels, cm, or even in inches.
Desired Color Themes
Many pre-built color themes exist in the CapCut creative suite in an image editor. This is an AI-based tool. It allows you to apply consistent and matching colors throughout the design. The color scheme option makes the fine details pop up. It makes your design enticing and captivating and plays a key role in keeping the audience or users hooked.
Using CapCut Creative Suite – Step By Step
Getting the most out of the CapCut comprises a few steps that you need to follow. Here are these steps for your consideration:
Sign Up:
In the beginning, you need to search the CapCut main toolkit site. After accessing the area on the top, you will observe the main menu bar containing multiple options. From these options, click on the tool tab from the menu. Doing so will open up the drop-down menu. The drop-down menu will show the different categories and lists. Go to the editor section and click on the online creative suite. This action will take you to the main page of the CapCut creative suite. Now, sign up for the tool. You can use a Google account, Facebook account, or TikTok account for this purpose.
Uploading the File
Once on the CapCut toolkit site, you have to make a choice. An option exists to select the online image editor or an online video editor to proceed from. After picking and clicking, you need to upload the file. You can upload images or videos as per tool selection. When you click on the upload tab, you can upload the file in two ways. You can choose the location of the file from a specific location, and you can select the file and drop it to the upload area.
Editing
After uploading the file, you need to deal with the editing part. CapCut’s creative suite offers complete freedom when it comes to editing. Just like professional editing, you can do the editing with this collection of tools. Change colors, effects, transitions, tracks, background, etc. You can do anything you want in terms of the editing process. Add up text, filter, and tweak the color scheme as per your requirements.
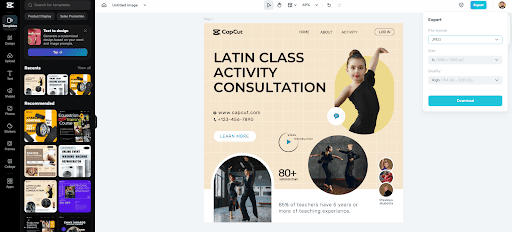
Downloading the File
When you are done with the editing process now, the last step is the downloading of the image or video file. To begin with the process, you need to go to the export tab present in the top right corner. This tab will allow you to change the image or video format, quality, name, and size. Once you have set these changes, click on the download tab present at the bottom.

![Create Meme GIFs with Best 4 Meme GIF Generators [Quick Guide]](https://www.seventech.ai/wp-content/uploads/2024/04/how-to-make-meme-gif.jpg)